Prepare Your Weed
Prepare Your Weed
Regardless of your end game, be it butter, oil, cookies, whatever, your weed needs to be prepped.
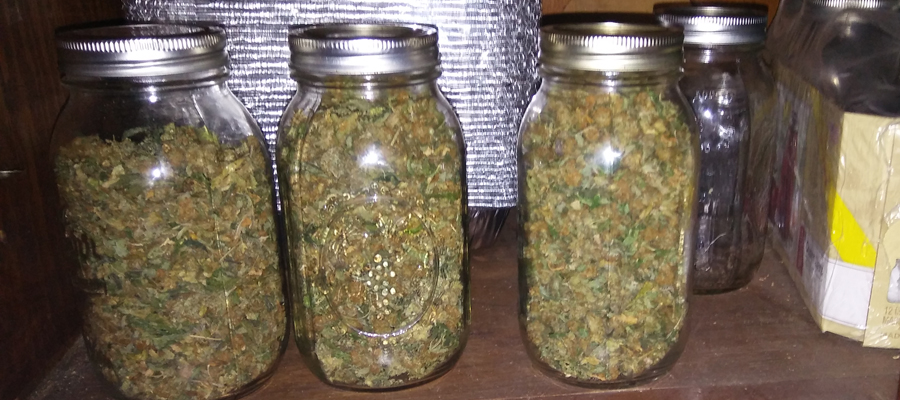
Weed can be prepared in advance, and if stored in glass containers in a cool, dark place, will maintain its potency. So, invest in some wide mouth canning jars, and the next time you’re potatoed out with Mr. Robot or Game of Thrones, grab your canister and grinder and prep your weed. Put it in a jar, and grab it when you need it.
Clean, Clean, Clean
Since butters and oils are strained, this isn’t so important when making infusions; and in all honesty, will not have any impact on the final flavor. It’s just rather unpleasant to be kicking back, munching down — and there’s a stem stuck in your teeth.
This is much more important when cooking with trimmings or lower quality shake. Remove visible stems and stalks before grinding; then pick out any of the little veins that were left after the grinding process.
And Speaking of Grinding…
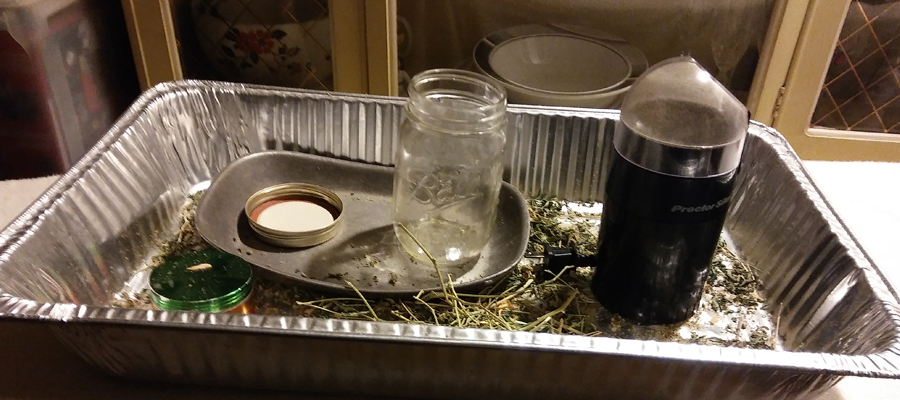
If you’re going to do this a lot, invest in a cheap coffee/spice grinder dedicated to the purpose. Hand grinders are fine, but be sure to get one big enough to do the job without developing carpel tunnel syndrome.
Weed goes everywhere — especially when it’s finely ground. Give yourself a working container to catch the dust and crumbs that will inevitably miss the jar when emptying the grinder. Disposable roasting pans work very well.
By the way, some people skip this step and just use whole buds. Personal preference is that grinding prior to processing renders the weed less obtrusive and “green” tasting.

Decarboxylate
You’ve been doing this for years — just probably didn’t know it.
This is the chemical process where non-stony THCA turns into the THC we want. Lighting and smoking a joint adds the heat required for this process to occur allowing the newly formulated THC to be absorbed by our lungs.
Heat must also be applied to release the THC into edibles so that it can be absorbed via ingestion.
Releasing the THC via the decarb process also allows you to use cheaper grades of weed. My first baking experience was with the rattiest shake you’ve ever seen. The cookies tasted a little “green” from all the leaf that was in there, but a good time was definitely had by all.
There are a plethora of swear-by decarb methods out there — grind first; don’t grind first. Some love the water bath, à la sous-vide, while others invest in fancy machines; but if you’ve got an oven and a baking sheet, you’re good to go.
Preheat the oven to 220° F (105° C). Spread the finely ground weed on a baking sheet into a single layer. This is another opportunity to remove those skinny little stems that always seem to survive even the most vigorous grind. Bake for 30 minutes or so — cool, store or use.
Heating at too high a temperature will start to kill the buzz. Keep it low and slow.
Why Decarb if the End Recipe is Going in the Oven
Compare the temperature of that newly lit match or the smoldering of a Zig-Zag to that of your 350° oven. Also interesting to note, banana bread baked in that same oven only has an internal temperature of 220° F. That’s certainly the correct temperature, but the bread was only at that temp for a small percentage of baking time toward the end. Cookies are done in minutes.
The above explanations are, admittedly, simplistic. Please Google the process for more information and to determine your own preferred method — you, too, can lose hours and hours of your life.

Storage
As previously stated, the best storage — especially for long term — is glass. Canning jars are the best. If you have a lot of product, it’s easiest to get two sizes — keep your aged weed in one, and your decarbed in the other. This is particularly important if you choose to skip the grinding step above and just decarb whole buds. Those jars are gonna all look alike — trust me. Or you could just get stickers…
Transferring weed from the baking sheet into the storage jar can be tricky. Lining the baking sheet with parchment paper comes highly recommended; however, it does not hold its shape well — and again, weed will go everywhere. Foil is hard to control, so some of your weed gets stuck in the ridges and wrinkles that will inevitably be created during the transfer process.
Enter the Laminated File Folder
Skip the parchment paper or foil, placing your weed in a thin layer directly onto the baking sheet. Get a file folder — laminated, if possible. After the weed has cooled, poor it from the baking sheet onto the opened file folder and let it slide down the center crease into the storage jar. There will be a lot of kief like residue on the baking sheet and the file folder. Hitting both with a non-silicone basting brush (the fine residue sticks to the silicone) will ensure that no goodie is left behind.
Pop the lid on your jar, store it in a cool, dark place.
